
A sturdy and well-designed fence gate not only improves security but also enhances the curb appeal of your property. Learning how to build a fence gate gives you the freedom to customize its design, save money, and gain a sense of accomplishment. Whether you’re upgrading an existing fence or starting from scratch, the process can be straightforward with the right planning, tools, and techniques.
In this comprehensive guide, you’ll learn the different types of fence gates, the best materials to use, step-by-step construction methods, and tips to make your gate last for years.
Understanding Fence Gate Types
Before you pick up a saw or a drill, it’s important to choose the right gate type for your needs.
Wooden Fence Gate
Wood offers a classic look that blends well with most outdoor designs. Cedar, redwood, and treated pine are popular choices because they resist decay.
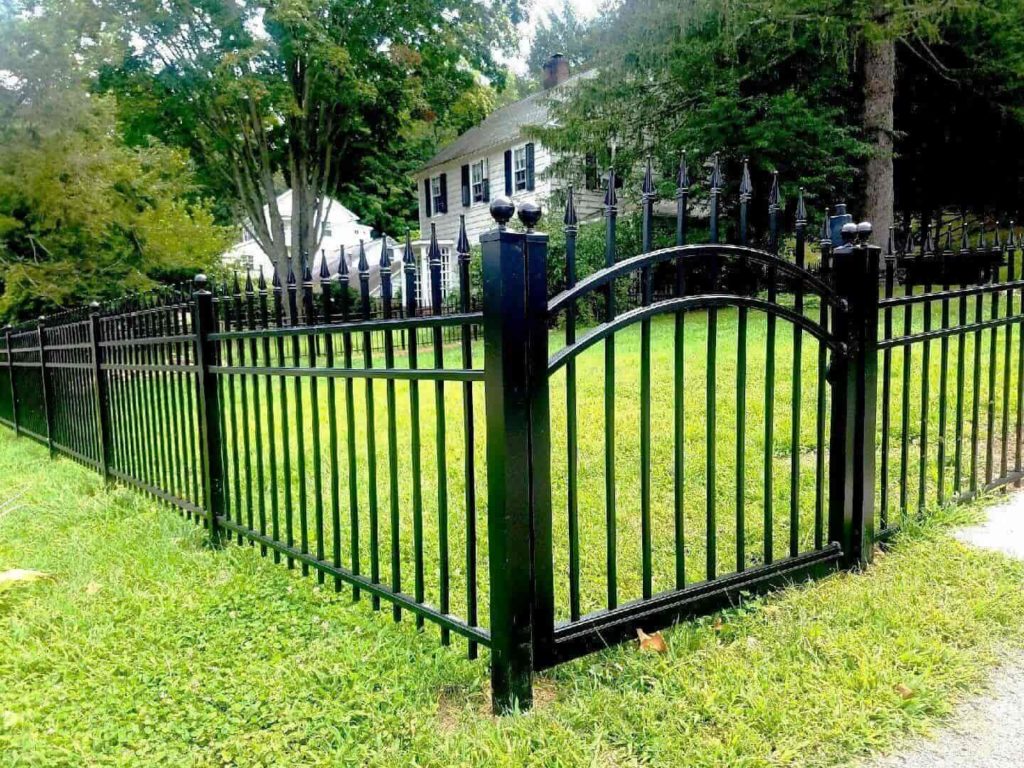
Metal Fence Gate
Steel and aluminum gates offer strength and low maintenance. They are ideal for areas where durability and security are priorities.
Vinyl Fence Gate
Vinyl gates are weather-resistant, low-maintenance, and available in various colors. They work well in modern or decorative fencing styles.
Choosing the Right Materials for Your Fence Gate
The quality of your materials determines the longevity of your fence gate.
Weather-Resistant Wood: Cedar and redwood are excellent choices for outdoor gates because they naturally repel insects and resist moisture damage. Their natural oils act as a protective barrier, reducing the risk of warping, rotting, or decay over time. This makes them a long-lasting and low-maintenance option for any outdoor project.
Steel Hinges: Heavy-duty galvanized or stainless steel hinges provide exceptional strength and durability for your gate. These materials are designed to withstand frequent use and harsh weather without bending or breaking. Their rust-resistant properties ensure smooth operation and a longer lifespan.
Rust-Proof Screws: Using exterior-grade screws helps keep your gate secure and stable even in extreme weather conditions. These screws are specially coated or made from materials that prevent rust and corrosion. This not only enhances the gate’s durability but also maintains its appearance over time.
Essential Tools for Building a Fence Gate
Having the correct tools is half the battle. You’ll need:
Measuring Tools: Tape measure, carpenter’s square, chalk line
Accurate measurements are the foundation of any successful project. A tape measure helps you determine lengths precisely, while a carpenter’s square ensures perfect right angles for cuts and joins. The chalk line is ideal for marking long, straight lines, providing a clear guide for accurate cutting and alignment.
Cutting Tools: Circular saw or handsaw
Cutting materials to the correct size requires the right tool for the job. A circular saw is perfect for making fast, precise cuts in wood and other materials, especially for larger projects. For smaller or more detailed work, a handsaw offers greater control, allowing you to make careful, accurate cuts without the need for electricity.
Fastening Tools: Drill, screwdriver, wood glue, clamps
Strong and secure assembly relies on effective fastening tools. A drill speeds up the process of creating holes and driving screws, while a screwdriver is essential for precise fastening in tighter spots. Wood glue provides extra bonding strength, and clamps hold pieces firmly in place while the glue sets, ensuring a durable and professional finish.
Planning Your Fence Gate Design
When planning your fence gate, consider its size, style, and intended purpose. A charming garden gate may be smaller and decorative, while a driveway gate should be wider and sturdier. Sketch your design carefully, ensuring you include accurate measurements for a perfect fit.
Measuring and Marking the Gate Area
Precision is essential to avoid gaps or misalignment later. Measure the opening between your fence posts and factor in enough clearance for hinges and latch operation. Mark the measurements clearly before moving to the cutting stage.
Cutting the Frame Pieces
Select rot-resistant wood and cut it precisely to the required dimensions. Accurate cuts are vital for a snug fit, ensuring the gate functions well and swings smoothly once installed.
Building the Gate Frame
Arrange your cut pieces on a flat surface and join them using wood glue and screws. As you assemble, check that all corners are square for proper alignment and long-term durability.
Adding Cross Braces for Stability
To prevent sagging, add a diagonal brace from the bottom hinge side to the opposite top corner. This extra support strengthens the frame and keeps it straight over time.
Attaching the Gate Boards
Lay the boards across the frame with small gaps between them to allow for natural wood expansion. Secure them with galvanized screws to resist rust and prolong the gate’s lifespan.
Installing the Hinges
Position the hinges about eight inches from the top and bottom edges of the gate. Use rust-resistant screws to attach them securely, ensuring they can bear the gate’s weight.
Mounting the Fence Gate
With assistance, lift the gate into position and align it perfectly with the fence posts. Attach the hinges to the post, checking that the gate swings freely without dragging.
Installing the Latch and Handle
Choose a latch that meets your security needs, whether a simple slide bolt for convenience or a keyed lock for added protection. Install the handle for easy operation.
Weatherproofing Your Fence Gate
Protect your gate from the elements by applying a quality stain, paint, or sealant. This treatment helps guard against rain, harsh sunlight, and insect damage, keeping your gate looking great for years.
How to Build a Fence Gate Step-by-Step Guide
- Measure and cut frame pieces.
- Assemble frame and add diagonal brace.
- Attach boards to frame.
- Install hinges and latch.
- Weatherproof the entire gate.
Step 1: Measure and cut frame pieces
Start by measuring the opening where you want your fence gate to be placed. Use these measurements to mark and cut your frame pieces accurately, ensuring straight edges for a secure fit. Precision at this stage will help the gate operate smoothly and last longer.
Step 2: Assemble frame and add diagonal brace
Lay the frame pieces on a flat surface and secure them together with screws or nails. Add a diagonal brace from the top corner on one side to the bottom corner on the other to prevent sagging. This brace provides extra strength and stability to the gate.
Step 3: Attach boards to frame
Once the frame is complete, attach the vertical or horizontal boards to it using corrosion-resistant screws. Keep the spacing even between boards for a neat appearance, or fit them tightly together for more privacy.
Step 4: Install hinges and latch
Position the hinges on the gate and secure them firmly to the frame, then attach them to the fence post. Next, install the latch on the opposite side, making sure it lines up correctly so the gate closes and locks easily.
Step 5: Weatherproof the entire gate
Apply a weatherproof sealant, stain, or paint to protect the gate from moisture, sun damage, and rot. This step not only increases the gate’s lifespan but also keeps it looking fresh and attractive year-round.
Safety Tips for DIY Fence Gate Building
When building your own fence gate, always wear gloves and safety goggles to protect your hands and eyes from sharp edges, splinters, and flying debris. Use clamps to secure the wood while cutting, ensuring precise and stable work. Keep all tools in good condition, as dull blades and faulty equipment can cause accidents and reduce work quality.
How to Maintain a Wooden Fence Gate
To keep your wooden fence gate in top shape, inspect it annually for signs of wear or damage. Reapply a weather-resistant sealant to protect against moisture and sun damage, and promptly replace any cracked or warped boards. Regular maintenance helps extend the life and appearance of your gate.
How to Maintain a Metal or Vinyl Fence Gate
Metal and vinyl gates require periodic cleaning to maintain their look and durability. Wash them with mild soap and water to remove dirt and grime. Check for rust on metal gates and address it quickly, and always lubricate hinges or moving parts to ensure smooth operation.
Signs It’s Time to Replace Your Fence Gate
If you notice warped wood, rusted hinges, or weakened structural integrity, it may be time to replace your fence gate. Delaying replacement can compromise security and aesthetics, and in some cases, repairs may cost more than installing a new gate.
Environmental Considerations
For an eco-friendly approach, choose FSC-certified wood sourced from responsibly managed forests. Opt for low-VOC paints or stains to reduce harmful emissions while still providing strong protection and a beautiful finish.
Enhancing Security with Your Fence Gate
Boost your gate’s security by adding sturdy deadbolts or reinforced frames. These upgrades make it harder for intruders to break in while giving you extra peace of mind.
Decorative Ideas for Fence Gates
Give your fence gate a unique touch with decorative features like lattice tops, intricate carvings, or painted designs. Match these elements to your landscaping or home’s style for a cohesive and inviting look.
DIY vs. Hiring a Professional
Building your own fence gate can save money but requires time, skill, and patience. Hiring a professional ensures faster completion, expert craftsmanship, and often includes a warranty for long-term protection.
Conclusion: Mastering How to Build a Fence Gate
Building your own fence gate is a rewarding project that enhances both function and appearance. With the right materials, tools, and guidance, you can create a sturdy, attractive gate that lasts for years.
FAQs
Can I build a fence gate without special tools?
Yes, but having the right tools ensures better accuracy and durability.
What wood is best for a fence gate?
Cedar and redwood are top choices for their resistance to decay.
How wide should a fence gate be?
Standard gates are 3–4 feet wide, but size depends on your needs.
How long will a wooden fence gate last?
With maintenance, 10–15 years is common.
Should I paint or stain my fence gate?
Staining penetrates wood for better protection, while paint offers more color options.
What’s the easiest type of fence gate to build?
A simple framed wooden gate is easiest for beginners.